Аутентификация
В этoй части мы настроим UI компонент аутентификации от AWS Amplify, а в следующей мы создадим его с нуля.
Весь код для этой части можно найти на GitHub.

Создаем новый проект ⚛️
npx react-native init auth
Запускаем проект
iOS
cd auth && react-native run-ios
Android
cd auth && react-native run-android

Подключаем иконки 👾
Так как иконки используются фреймворком AWS Amplify, поэтому подключаем их согласно этой инструкции 📃. Проверяем наличие ошибок.
Добавляем в App.js
import Icon from 'react-native-vector-icons/FontAwesome5'

const App = () => {
  return (
    <>
      <Icon name="comments" size={30} color="#900" />
    </>
  )
}

Регистрируем свой AWS account
Регистрируемся согласно этой инструкции 📃 и по видеоучебнику📺 чекаем все 5 шагов.
Там же смотрим и ставим Amplify Command Line Interface (CLI)

Инициализация AWS Amplify в проект React Native
В корневой директории проекта React Native инициализируем наш AWS Amplify проект
amplify init
Отвечаем на вопросы:
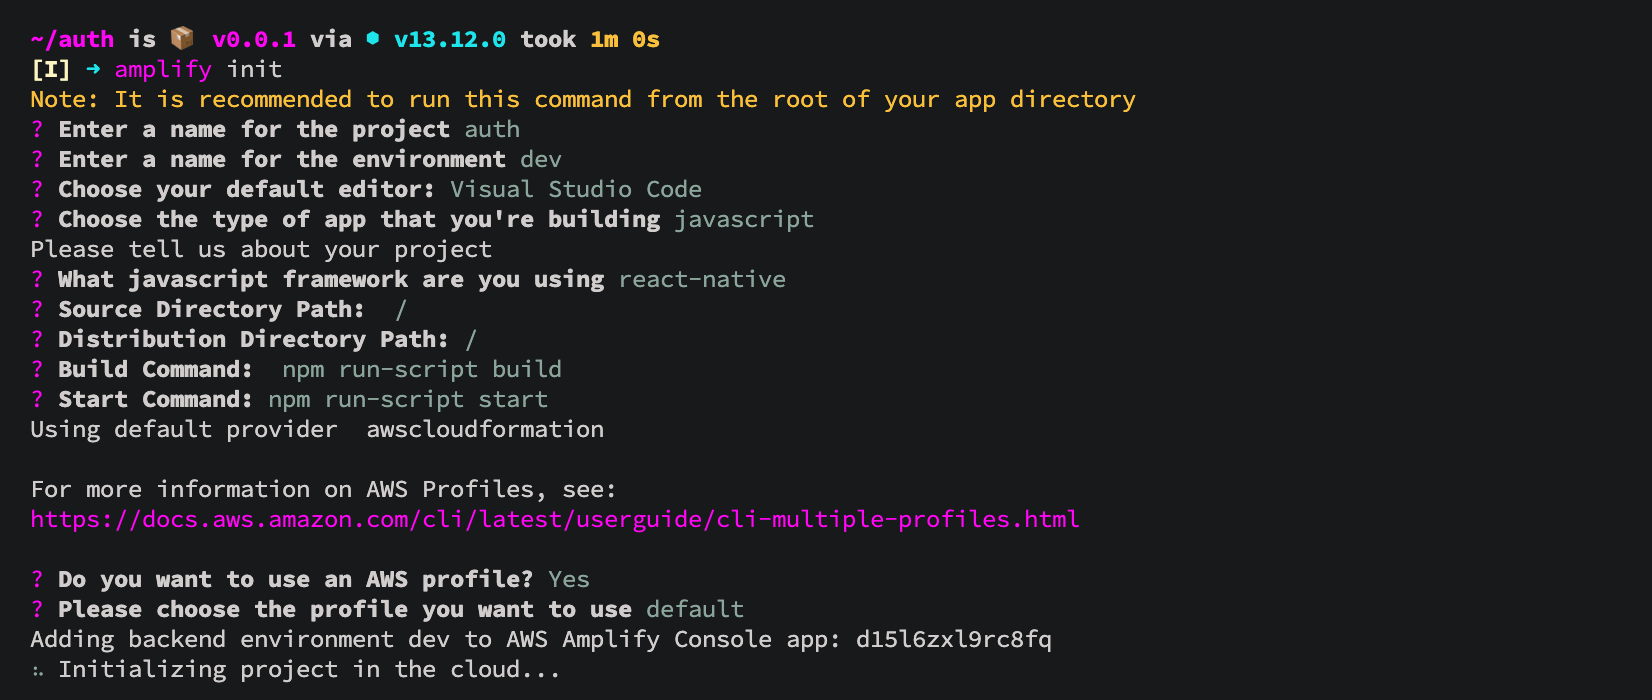
Проект инициализацировался

Подключаем плагин аутентификации
Теперь, когда приложение находится в облаке, вы можете добавить некоторые функции, такие как предоставление пользователям возможности зарегистрироваться в нашем приложении и войти в систему.
Командой
amplify add auth
подключаем функцию аутентификации. Выбираем конфигурацию по умолчанию. Это добавляет конфигурации ресурсов auth локально в ваш каталог ampify/backend/auth
Выбираем профиль, который мы хотим использовать. default. Enter и как пользователи будут входить в систему. Email(За SMS списывают деньги).

Отправляем изменения в облако 💭
amplify push
✔ All resources are updated in the cloud

Подключаем AWS Amplify в проект React Native ⚛️
Подробности в этой инструкции 📃, а коротко и по прямой так:
yarn add aws-amplify @aws-amplify/core aws-amplify-react-native amazon-cognito-identity-js @react-native-community/netinfo
После установки обязательно заходим в папку ios и ставим поды
cd ios && pod install && cd ..

Редактируем структуру проекта
Создаем директорию /src и переносим туда файл App.js, переименовывая его в index.js
Правим импорт в /auth/index.js и скрываем будущие предупреждения.
import { AppRegistry, YellowBox } from 'react-native'
import App from './src'
import { name as appName } from './app.json'

YellowBox.ignoreWarnings([
  'Warning: AsyncStorage',
  'Warning: componentWillReceiveProps',
  'RCTRootView cancelTouches',
  'not authenticated',
  'Sending `onAnimatedValueUpdate`'
])

//window.LOG_LEVEL = 'DEBUG'

AppRegistry.registerComponent(appName, () => App)

Минимальная конфигурация проекта и модуль Authenticator
Amplify.configure — конфигурация проекта
Authenticator — Модуль AWS Amplify Authentication предоставляет API-интерфейсы аутентификации и стандартные блоки для разработчиков, которые хотят создавать возможности аутентификации пользователей.
import React from 'react'
import { StatusBar } from 'react-native'
import Amplify from '@aws-amplify/core'
import { Authenticator } from 'aws-amplify-react-native'
import awsconfig from '../aws-exports'

Amplify.configure({
  ...awsconfig,
  Analytics: {
    disabled: true
  }
})

const App = () => {
  return (
    <>
      <StatusBar barStyle="dark-content" />
      <Authenticator usernameAttributes="email" />
    </>
  )
}

export default App
Запускаем симулятор, где нас встречает UI компонент аутентификации:
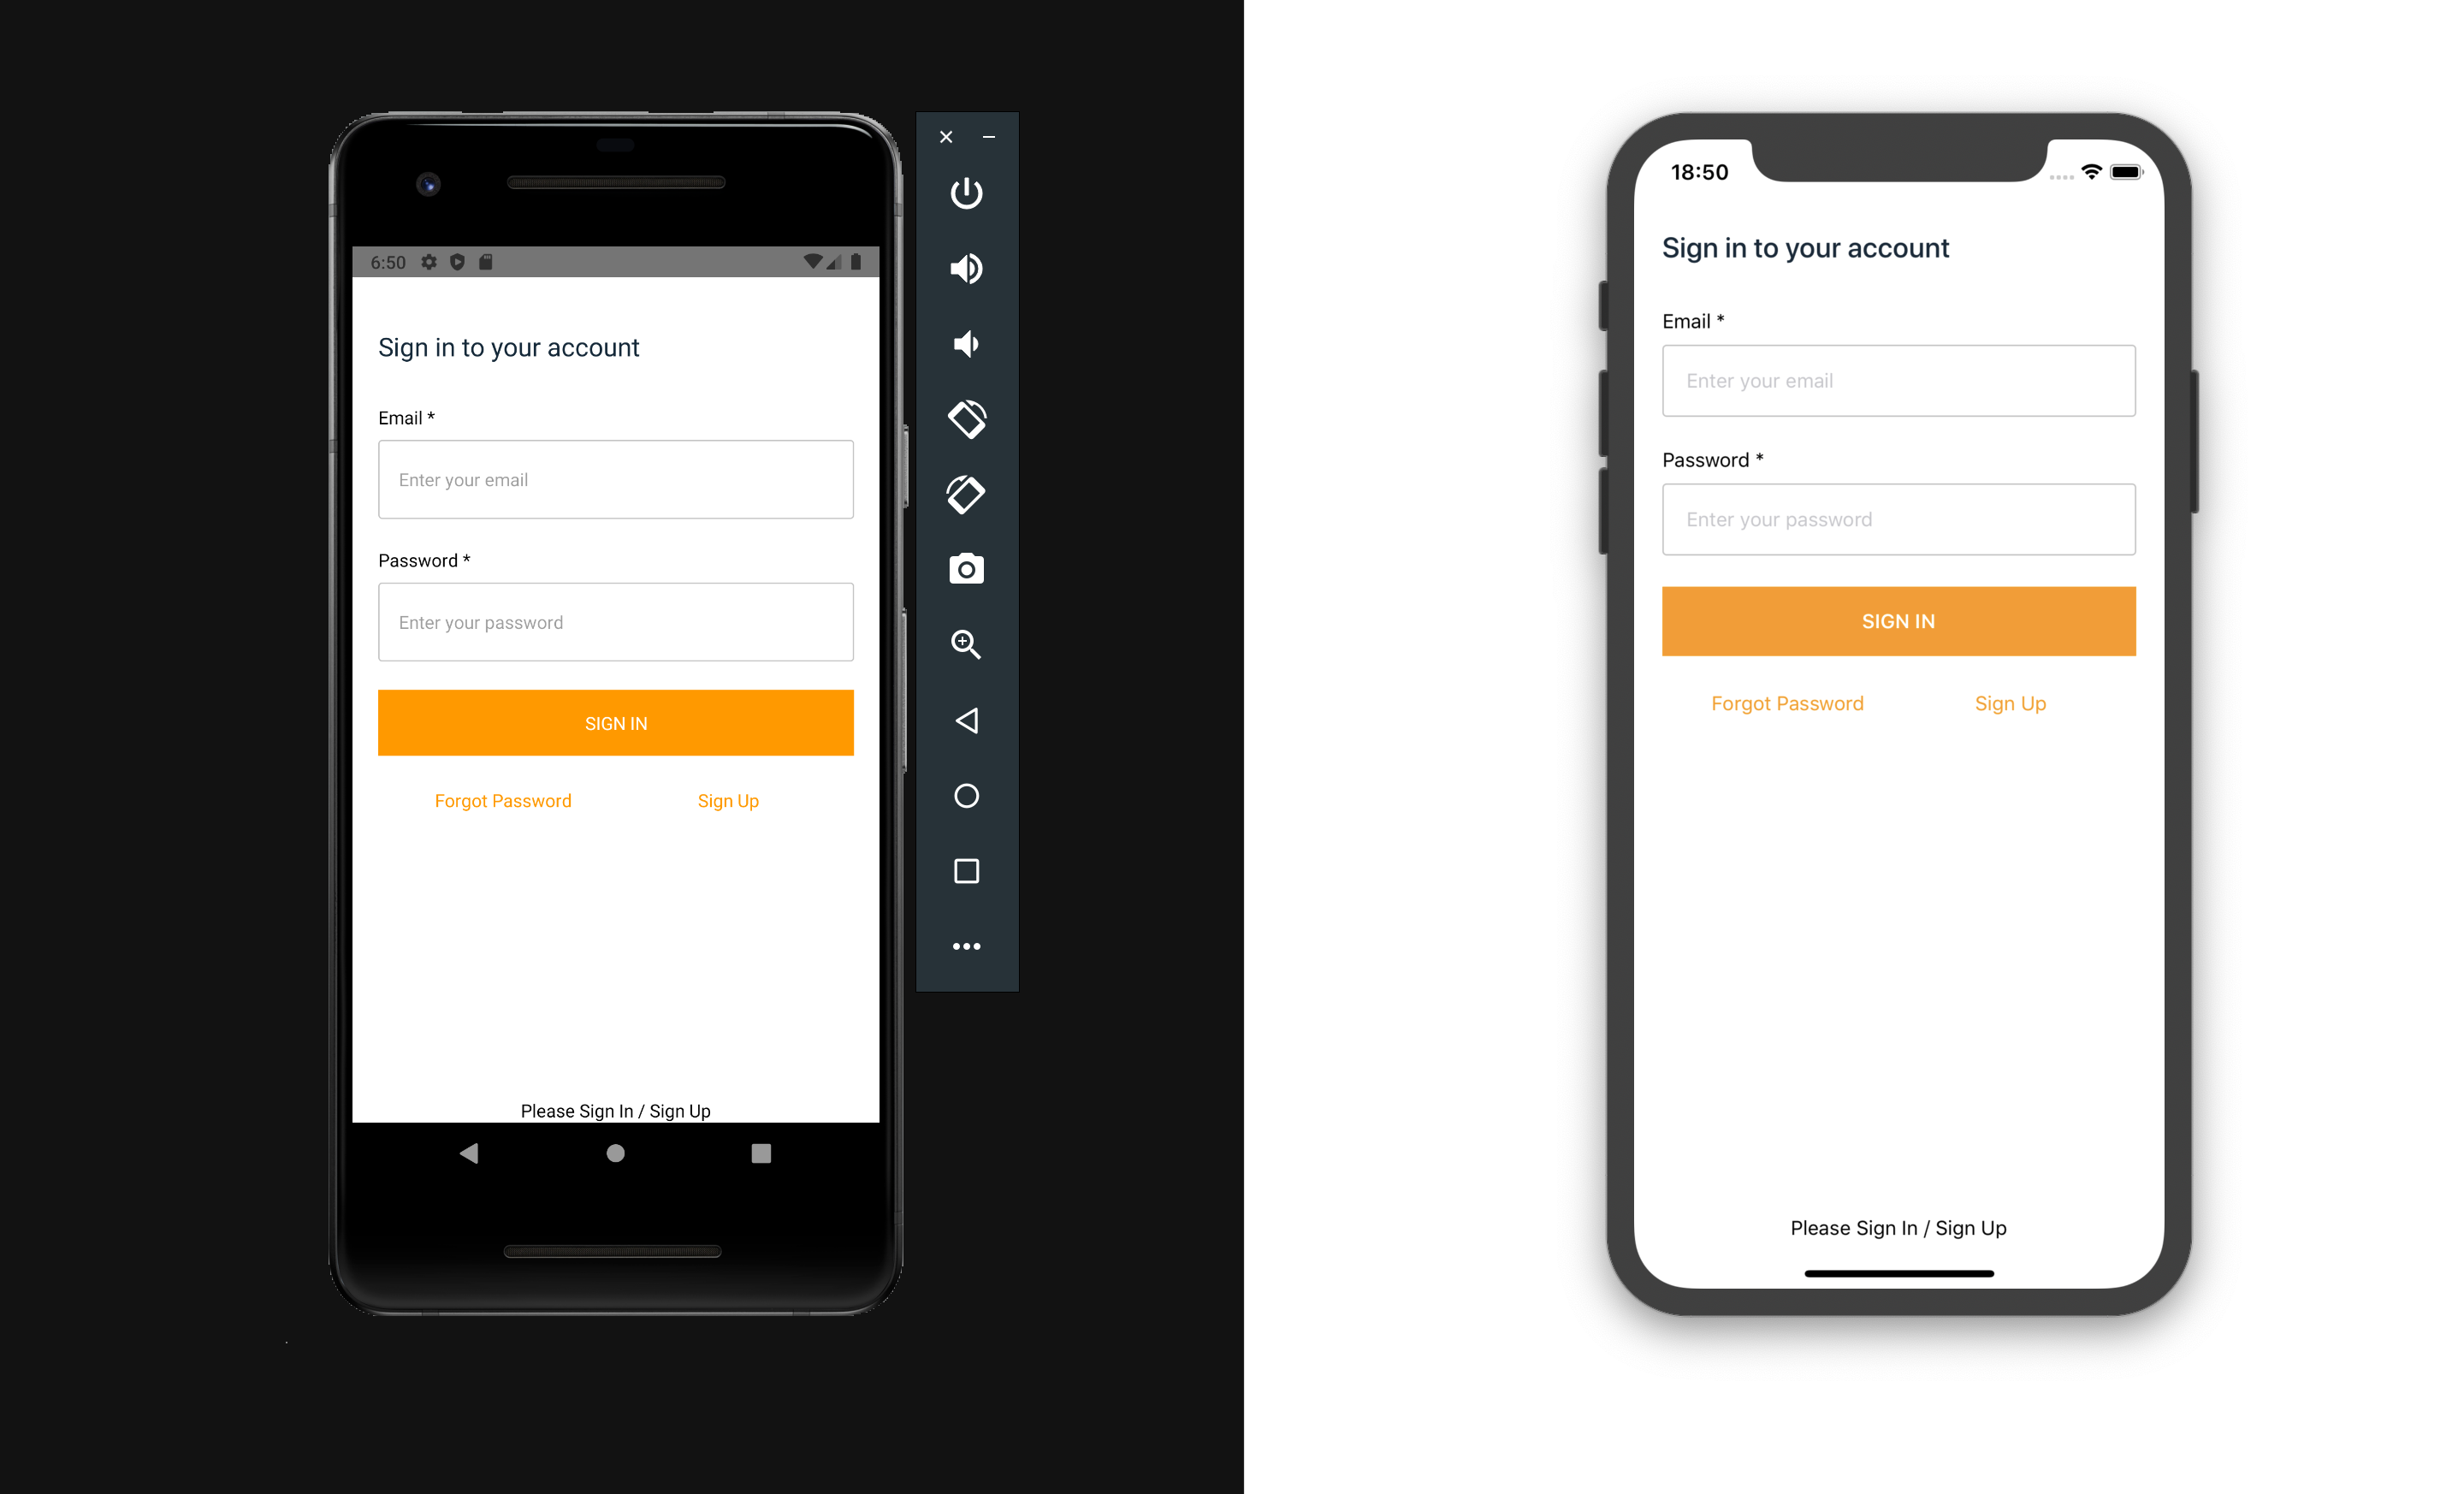

Правим инпуты в App.js
Для этого добавляем signUpConfig
const signUpConfig = {
  hideAllDefaults: true,
  signUpFields: [
    {
      label: 'Email',
      key: 'email',
      required: true,
      displayOrder: 1,
      type: 'string',
    },
    {
      label: 'Password',
      key: 'password',
      required: true,
      displayOrder: 2,
      type: 'password',
    },
  ],
}


<Authenticator
   usernameAttributes="email"
   signUpConfig={signUpConfig}
/>

Меняем тему UI 🖌
Создаем точку экспорта наших будущих компонентов /src/components/index.js с содержанием
export * from './AmplifyTheme'
и соответствено создаем сам файл /src/components/AmplifyTheme/index.js темы с содержанием
import { StyleSheet } from 'react-native'

export const deepSquidInk = '#152939'
export const linkUnderlayColor = '#FFF'
export const errorIconColor = '#30d0fe'

const AmplifyTheme = StyleSheet.create({
  container: {
    flex: 1,
    flexDirection: 'column',
    alignItems: 'center',
    justifyContent: 'space-around',
    paddingTop: 20,
    width: '100%',
    backgroundColor: '#FFF'
  },
  section: {
    flex: 1,
    width: '100%',
    padding: 30
  },
  sectionHeader: {
    width: '100%',
    marginBottom: 32
  },
  sectionHeaderText: {
    color: deepSquidInk,
    fontSize: 20,
    fontWeight: '500'
  },
  sectionFooter: {
    width: '100%',
    padding: 10,
    flexDirection: 'row',
    justifyContent: 'space-between',
    marginTop: 15,
    marginBottom: 20
  },
  sectionFooterLink: {
    fontSize: 14,
    color: '#30d0fe',
    alignItems: 'baseline',
    textAlign: 'center'
  },
  navBar: {
    marginTop: 35,
    padding: 15,
    flexDirection: 'row',
    justifyContent: 'flex-end',
    alignItems: 'center'
  },
  navButton: {
    marginLeft: 12,
    borderRadius: 4
  },
  cell: {
    flex: 1,
    width: '50%'
  },
  errorRow: {
    flexDirection: 'row',
    justifyContent: 'center'
  },
  errorRowText: {
    marginLeft: 10
  },
  photo: {
    width: '100%'
  },
  album: {
    width: '100%'
  },
  button: {
    backgroundColor: '#30d0fe',
    alignItems: 'center',
    padding: 16
  },
  buttonDisabled: {
    backgroundColor: '#85E4FF',
    alignItems: 'center',
    padding: 16
  },
  buttonText: {
    color: '#fff',
    fontSize: 14,
    fontWeight: '600'
  },
  formField: {
    marginBottom: 22
  },
  input: {
    padding: 16,
    borderWidth: 1,
    borderRadius: 3,
    borderColor: '#C4C4C4'
  },
  inputLabel: {
    marginBottom: 8
  },
  phoneContainer: {
    display: 'flex',
    flexDirection: 'row',
    alignItems: 'center'
  },
  phoneInput: {
    flex: 2,
    padding: 16,
    borderWidth: 1,
    borderRadius: 3,
    borderColor: '#C4C4C4'
  },
  picker: {
    flex: 1,
    height: 44
  },
  pickerItem: {
    height: 44
  }
})

export { AmplifyTheme }
И подключаем тему в компонент Authenticator src/index.js
import { AmplifyTheme } from './components'
;<Authenticator usernameAttributes="email" signUpConfig={signUpConfig} theme={AmplifyTheme} />
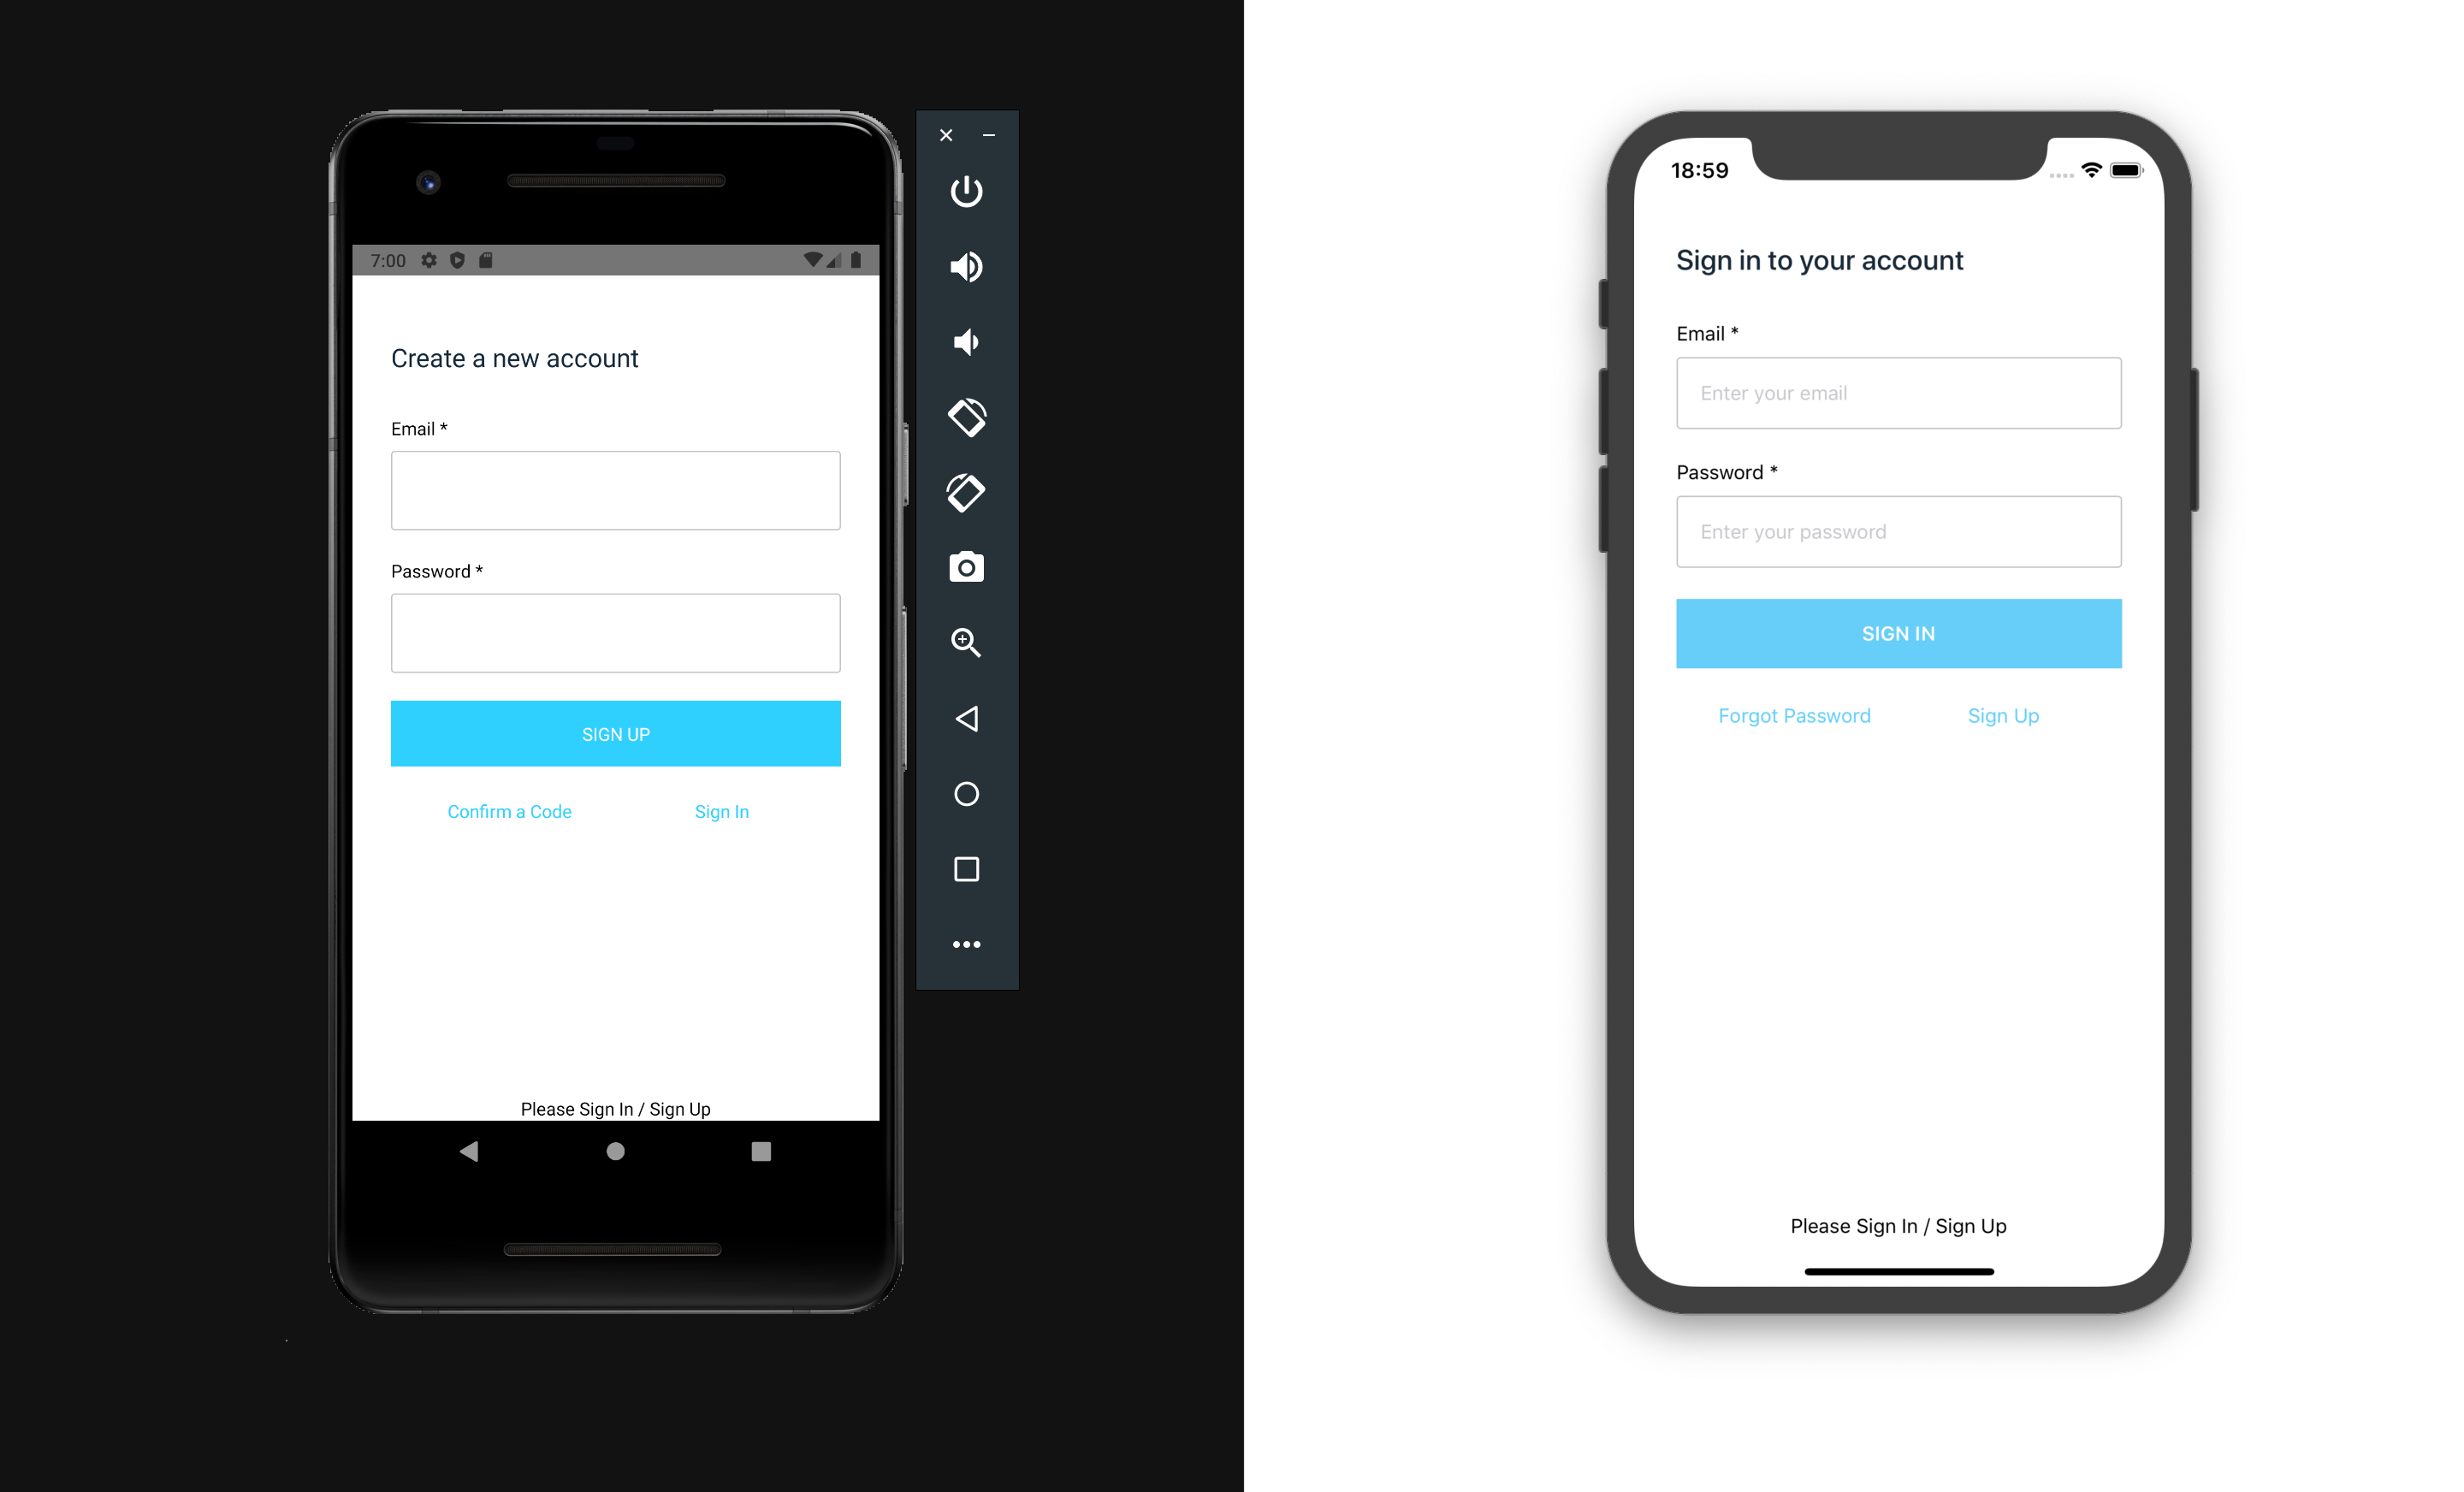
Подключаем локализацию
В нашем случае русский язык 🇷🇺
Добавляем экспорт в /src/components/index.js
export * from './Localei18n'
Cоздаем сам файл /src/components/Localei18n/index.js с содержанием
import { NativeModules, Platform } from 'react-native'
import { I18n } from '@aws-amplify/core'

let langRegionLocale = 'en_US'

// If we have an Android phone
if (Platform.OS === 'android') {
  langRegionLocale = NativeModules.I18nManager.localeIdentifier || ''
} else if (Platform.OS === 'ios') {
  langRegionLocale = NativeModules.SettingsManager.settings.AppleLocale || ''
}

const authScreenLabels = {
  en: {
    'Sign Up': 'Create new account',
    'Sign Up Account': 'Create a new account'
  },
  ru: {
    'Sign Up': 'Создать аккаунт',
    'Forgot Password': 'Забыли пароль?',
    'Sign In Account': 'Войдите в систему',
    'Enter your email': 'Введите email',
    'Enter your password': 'Введите пароль',
    Password: 'Пароль',
    'Sign In': 'Вход',
    'Please Sign In / Sign Up': 'Войти / Создать аккаунт',
    'Sign in to your account': 'Войдите в свой аккаунт',
    'Create a new account': 'Cоздайте свой аккаунт',
    'Confirm a Code': 'Подтвердите код',
    'Confirm Sign Up': 'Подтвердите регистрацию',
    'Resend code': 'Еще отправить код',
    'Back to Sign In': 'Вернуться к входу',
    Confirm: 'Подтвердить',
    'Confirmation Code': 'Код подтверждения',
    'Sign Out': 'Выход'
  }
}

// "en_US" -> "en", "es_CL" -> "es", etc
const languageLocale = langRegionLocale.substring(0, 2)
I18n.setLanguage(languageLocale)
I18n.putVocabularies(authScreenLabels)

const Localei18n = () => null

export { Localei18n }
И подключаем компонент Localei18n в src/index.js
import {
   AmplifyTheme,
   Localei18n
} from './components'


<Localei18n />
<Authenticator
  usernameAttributes="email"
  signUpConfig={signUpConfig}
  theme={AmplifyTheme}
/>
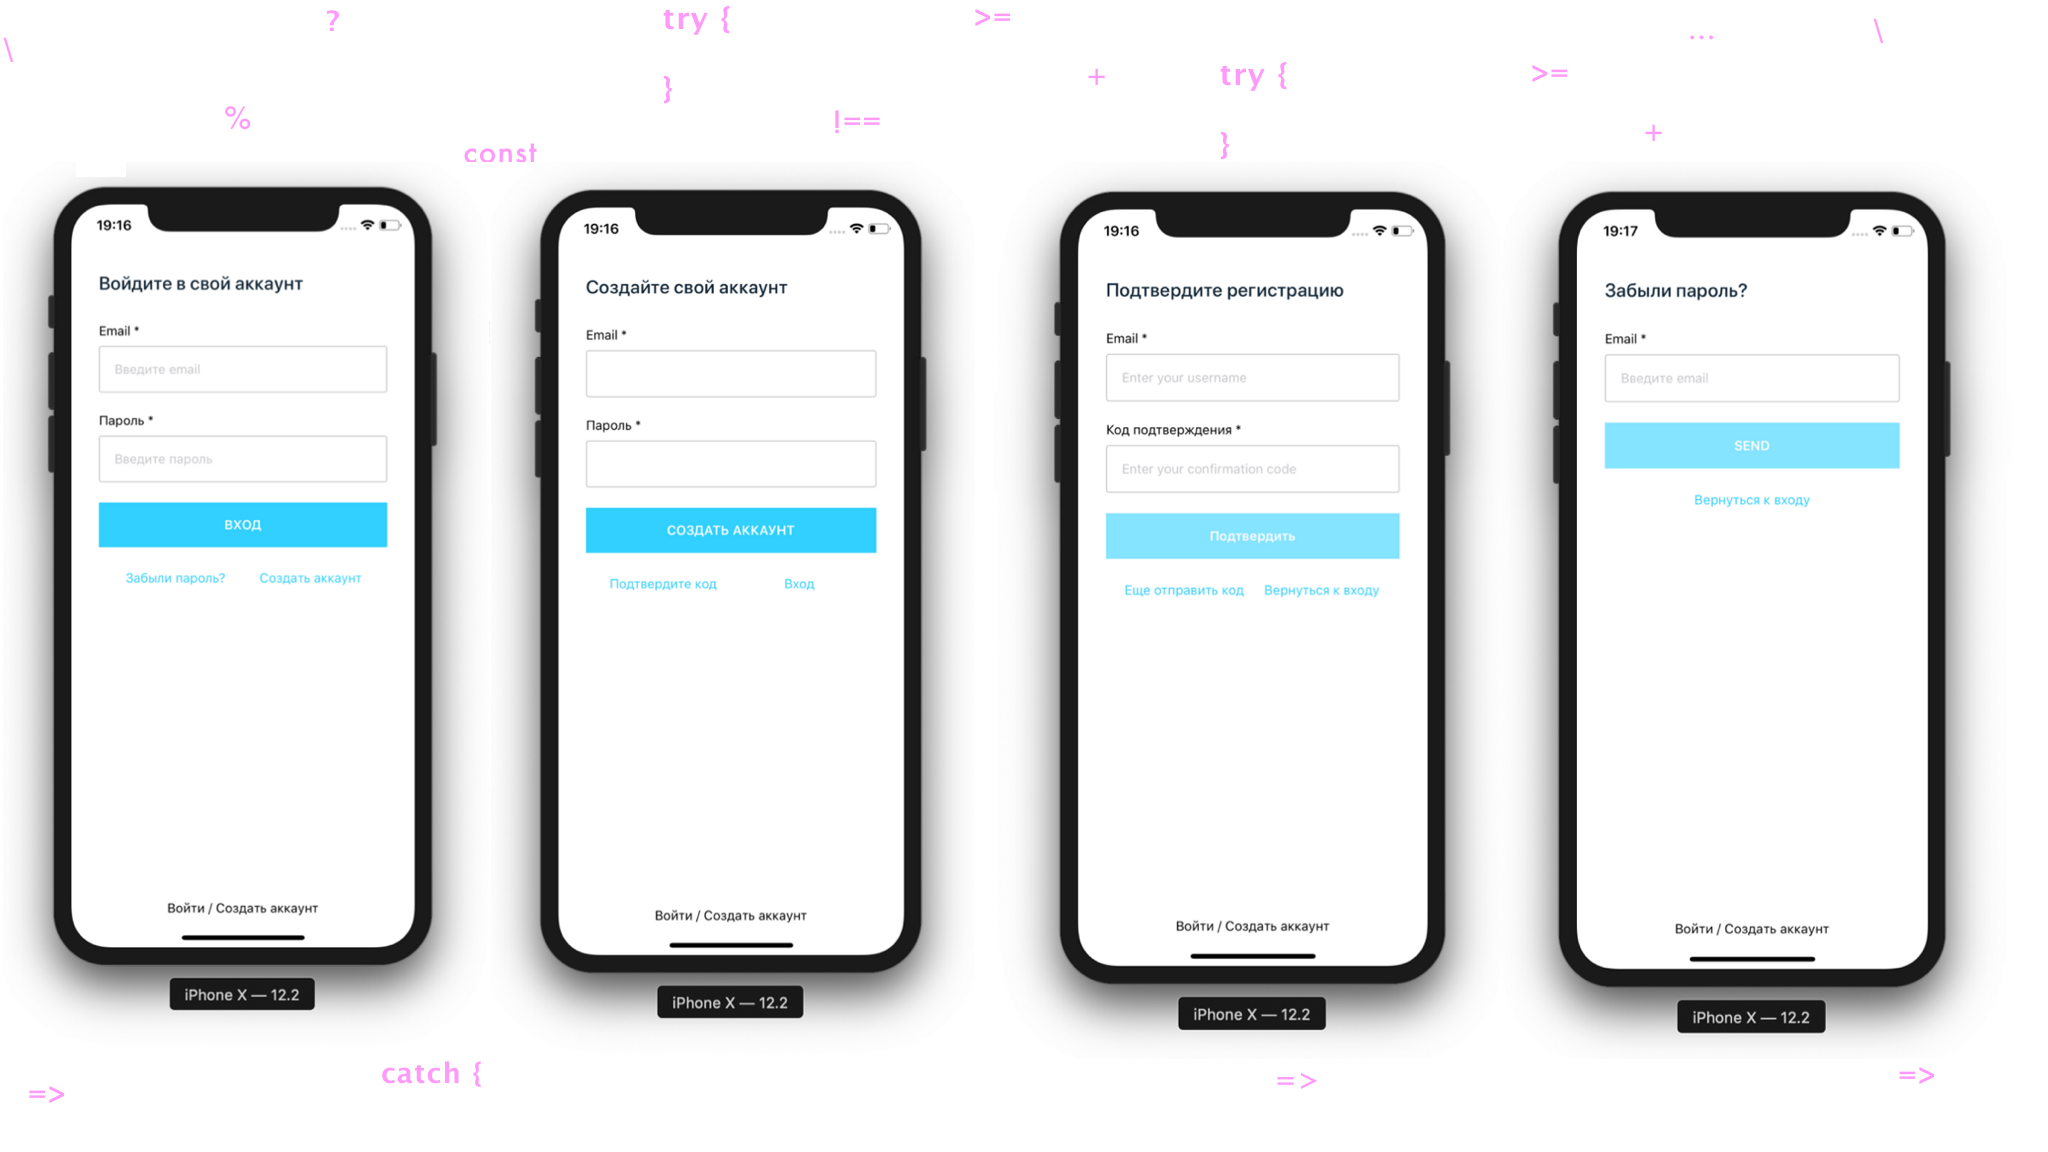
Запускаем проект, где видим, что локализация еще не применилась. Поэтому меняем в настройках своего симулятора язык на русский
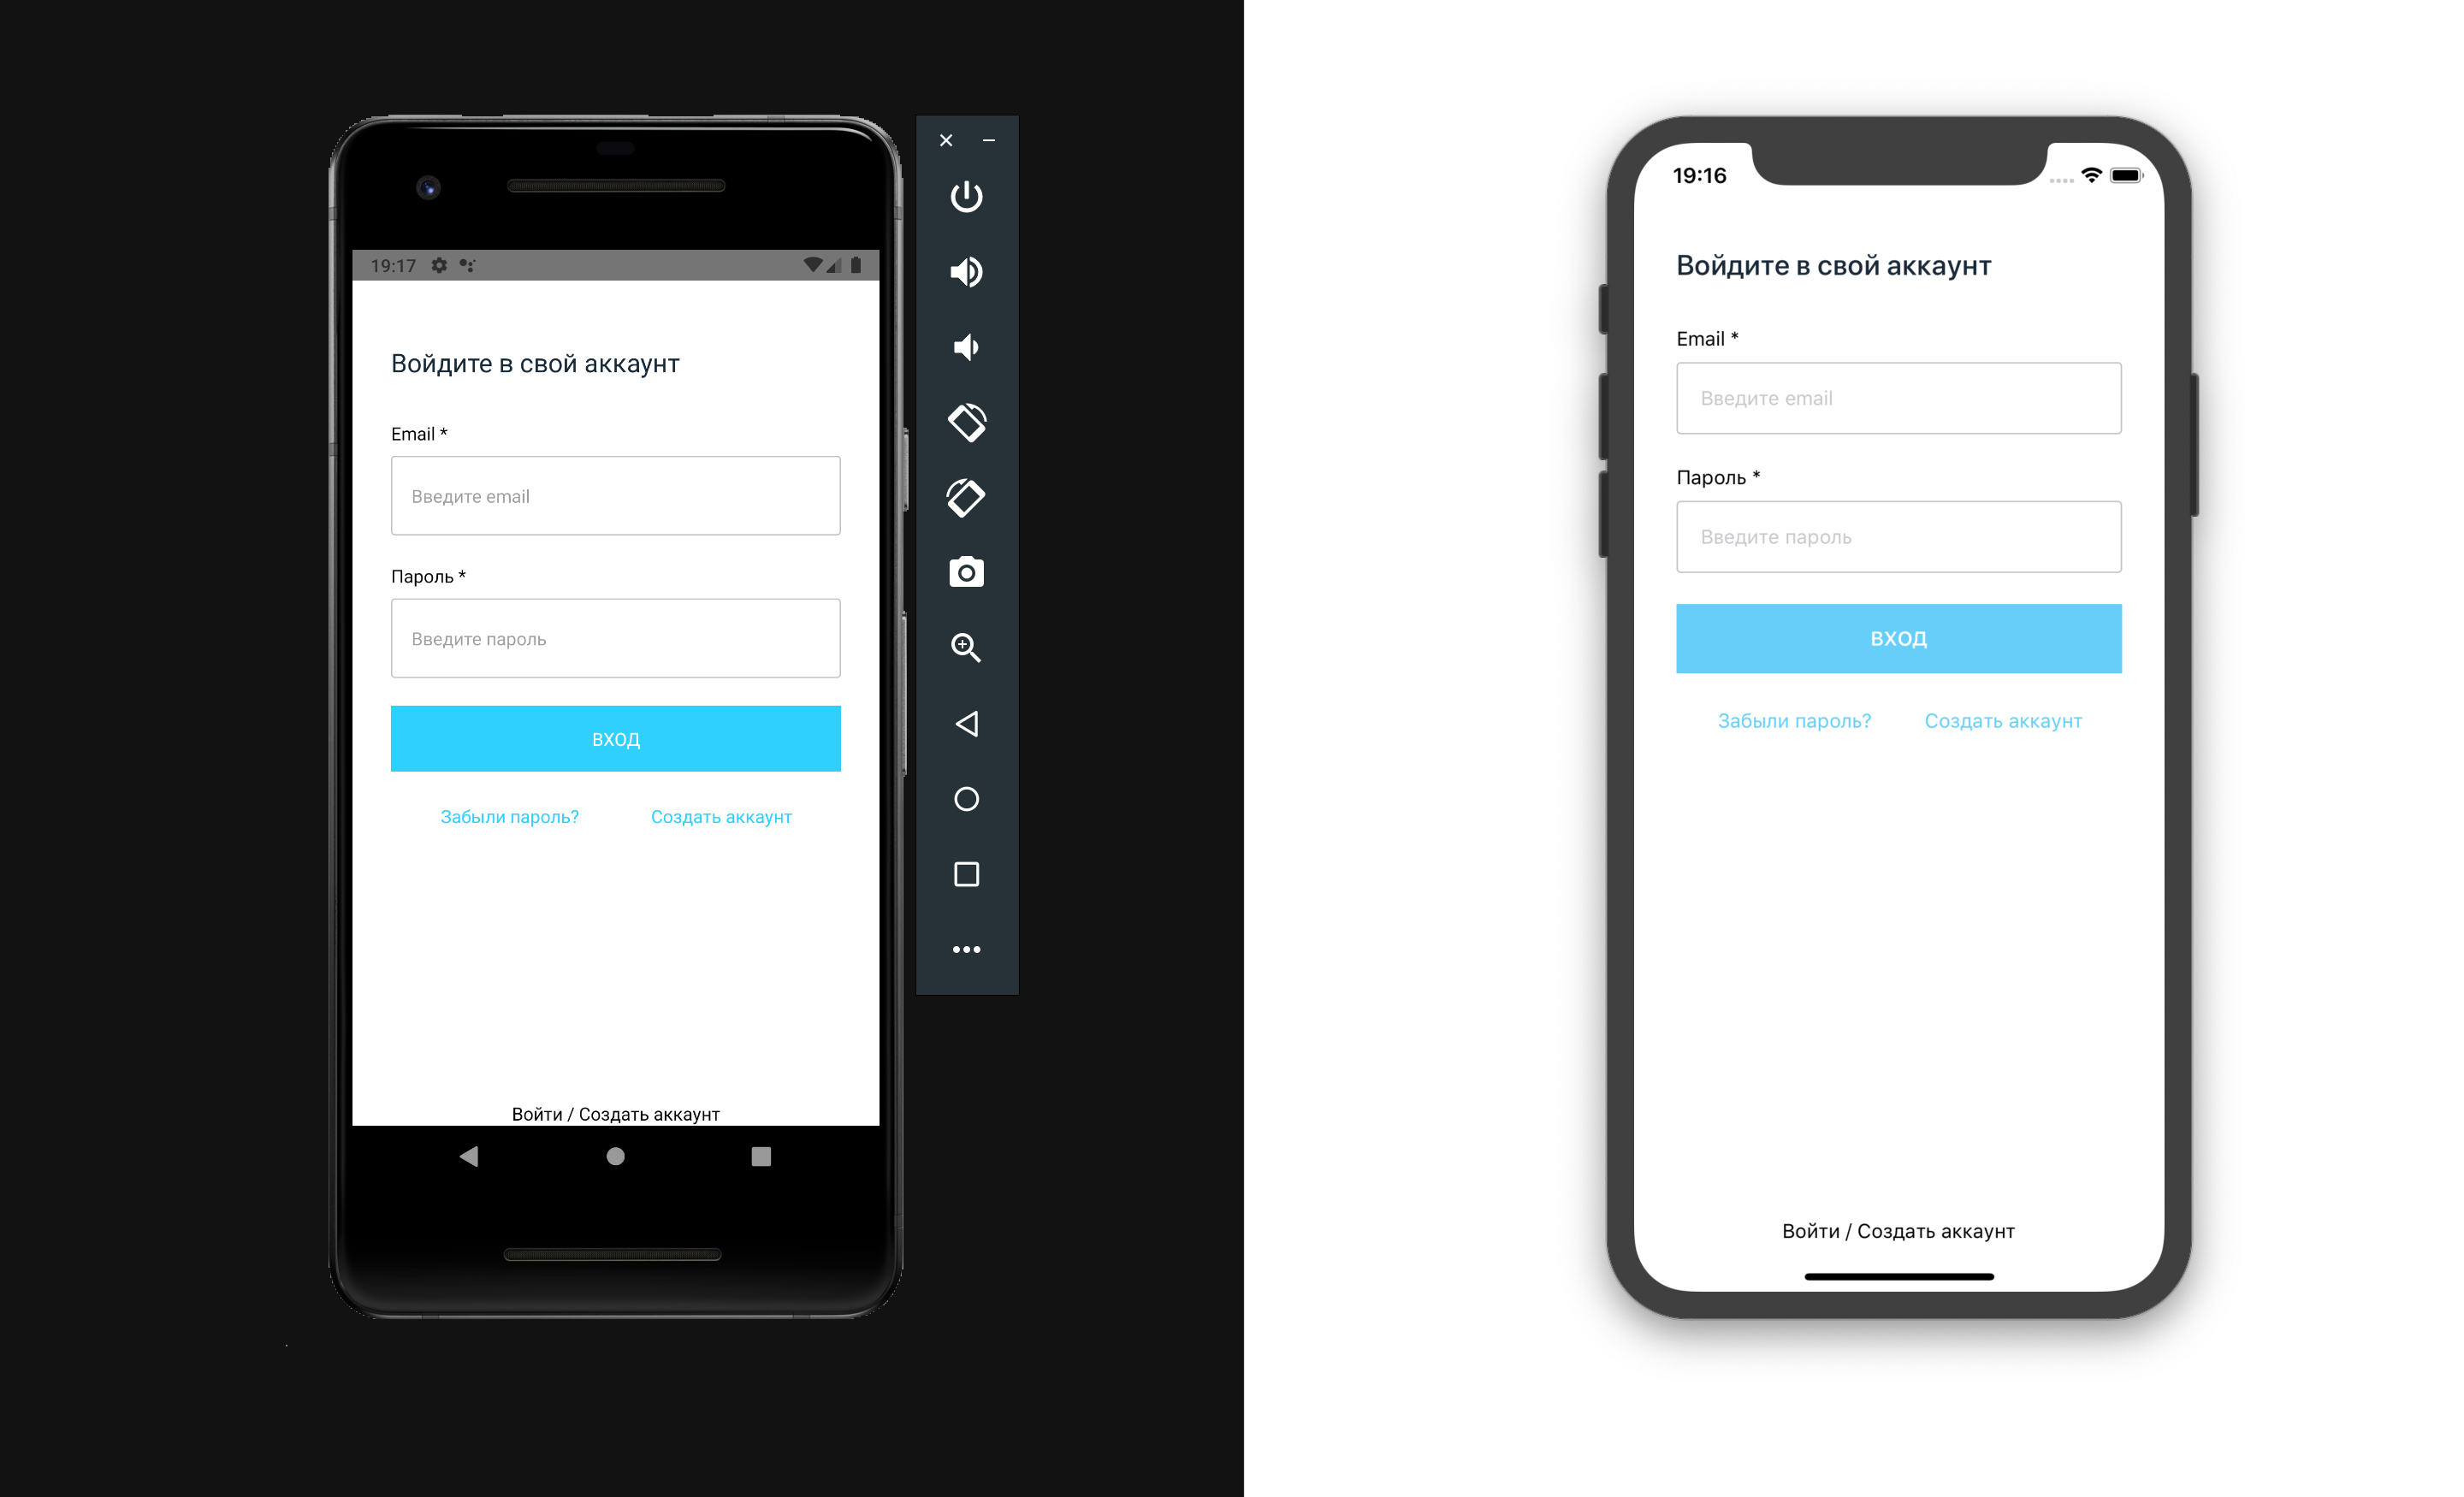
Done
Contributors ✨
Thanks goes to these wonderful people (emoji key):
Dmitriy Vasilev 💵 |
